Monday, March 2, 2015

Mademoiselle Pressée N°2

Français

Difficulty : 

Hey girls ! This weekly manucure is once again a Mademoiselle Pressée, so very easy and quick to reproduce. You can check out the clip by clicking on THIS link.
Before getting started, you will need : A black nail polish, a very light pink nail polish and a little dotting tool.

First and foremost, start by applying your base coat. Then, take your light pink nail polish and paint one layer on each of your nails. Once the first layer is dry, apply a second coat.


Thursday, February 19, 2015

Mademoiselle Pressée N°1


Difficulty : 

Hey girls ! Today's manucure is special because it's the first tuto of my new category called 'Mademoiselle Pressée' which basically means "Lady in a hurry" (or rush if you prefer). However, The goal was to define what kind of nail art could be as simple as pretty, and also very quick to do ! And so here's our first tuto ! Let's get started ! You can also check out my Youtube channel to see the clip. 
For this manucure you will need : two nail polishes, a gold one and a dark red or brown polish. 
(NO TOOLS :o !)

First, start by applying your base.
Then, take the dark nail polish and apply two coats of it.

Once your coats are dry, just take the golden nail polish and paint a thick line in the middle of your nail. 
All you have left to do is cover your nails with a shiny top coat !


References :
Germanicure By OPI from OPI
Champagne Kisses by China Glaze


Thursday, February 5, 2015

Animal Prints


Difficulty : 

Hey girls ! So today we have one of the easiest nail art design there is : Animal Prints. It's obviously nice and simple to look at, and so very easy to do ! You might as well want to watch the tuto on YouTube !
However, for this manucure you will need : a pink nail polish, a black nail polish and two different sized dotting tool.
First and foremost, start by applying your base coat. Then take your pink nail polish and paint two layers, letting each of them dry.

Then, with your bigger sized dotting tool and your black polish, draw three dots on your nail, letting space between each of them. Next step and also last step ; take your little sized dotting tool and draw three little dots next to each big dot. 
You may as well change the directions of the dots to make it a little more fun (i did that).

Then, last but not least, take your top coat when all your nail are reaaaaaally dry, and paint a coat. 

References :


Monday, January 26, 2015

Black Divine


Difficulty : 

Hey girls ! I'm now back on my blog, hope you didn't miss the tutos too much though, and even if you did, they are now back ! So today will be "Black Divine" an easy tuto but you will need tools for this lovely manucure : A little sized dotting tool and striping tape, once you've gathered these, you will need those nail polishes : A black nail polish, a silver mettalic polish, a gold one and a top coat as well as a matte top coat.

Let's get started ! First, like the old times, start by applying your base coat. Then, apply two coats of black polish on each of your nails. Let it dry and then follow the steps below the picture !


  • For your thumb, your index and your middle finger : make diamong shaped stripes with your striping tape on your three fingers ; you might want to change the numbers of diamonds though, like I did for the middle finger. Once you've sticked them well enough, put a layer of matte top coat on each of them and then immediately take the striping tape off. Once your top coat is dry enough, take your little dotting tool and make golden dots (with the golden nail polish) on each intersection like I did. Most importantly : DON'T apply any other layer of top coat on top of these or you might ruin the nice effect it is suppose to do.
  • Now for the easy part : Your ring finger : First apply your matte top coat on top of it, and then with your dotting tool and your black nail polish, just make regular dots all over your nail.
  • For the last part, which is really identical to the first step, your little finger : Apply your striping tape the same way you did precedently and instead of applying a matte top coat, apply your silver mettalic polish. Once again, take off the striping tape really fast before your nail dries. Once it is dry, take your dotting tool and make dots over the intersection of the lines. Once it is dry, apply your shiny top coat on top of it. 
Once you're done, you will really appreciate the mix between the two types of top coats ! I hope you liked this tuto, let me know in the comments space below the tuto ! 

References :


Thursday, January 15, 2015

Coming Back Soon // De Retour ASAP !

Hey girls !
First and foremost, I wanted to apologize for weeks passing by, and nothing coming up on my blog.
I can explain myself by telling you that my computer broke down and I had to purchase another one... Just arrived today. However, it's totally the same for my Vlogs. But good news are : Each are starting again very soon (time for me to get settled with my new computer) AND I now have a tripod !
See you soon girlz <3

Coucou les filles !
Je voulais avant tout m'excuser pour ces quelques semaines sans Vlogs ni articles ; Mon pc m'a laché ! Alors qu'en plus je vous avais préparé des petites vidéos de noël niveau vernis ainsi qu'un superbe article... Les bonnes nouvelles : Les articles ainsi que les Vlogs reprennnent très bientot mais surtout : J'ai enfin mon trépieds ! Ce qui signifie des tutos pour les ongles sur youtube !
A très bientôt mes petits loups <3


WonderDelphine <3

Wednesday, December 17, 2014

Winter Spirit


Difficulty : 

Hey girls ! Today's weekly manucure contains snow and an Olaf inspired design. It's far from perfect I guess, but I hope you'll like it though. 
So for this manucure you will need : 5 nail polishes : White, Blue, Black, Light Brown and Orange. You'll also need 2 different sized dotting tool, and a nail art brush.
Let's get started ! First, start by applying your base. Once dry, paint each nail in blue. Paint a second coat.
Now's for the hard part : SNOWFLAKES. With your nail art brush and your white nail polish, draw one line on the edge of your nail, and make little lines on this big line. (I should totally film this tuto..) Because snowflakes are big, just draw some on the edge of your nail. Then, just fill in the rest of your nail with a few dots, some bigger and some smaller. For the little finger, I decided to draw a tree. Just take your nail art brush and just draw little lines shaping like a tree. Fill in the rest of your nail with little dots. 
Now's for the hardest part : OLAF. Our dear friend... First, start by drawing his head with your white nail polish. Just go over two thirds of your nail.Then, just do a little bump on top to make his head's shape look better. The neatest part was from far the hardest, trust me.
Then, just with your big dotting tool and your black nail polish, draw two dots for his eyes, go in with smaller dots and your white nail polish, and then take your tiniest dotting tool and draw tiny black dots inside the white ones. Take a nail art brush and draw his mouth (like on picture above) then just fill it in with your black nail polish. With a dotting tool, just draw out the teeth inside his mouth ! For his nose : Just take a basic dotting tool with your orange nail polish, make a dot and drag the dot towards the mouth. With your brown nail polish and your nail art brush, we just need to draw his eyebrows. Just make a thin line above his eyes. And to finish our Olaf, just make 3 lines on top of his head to do his hair ! 
The easiest and funiest part is to come : the ring finger. With your white nail polish, simply paint the bottom of your nail. Then, with a nail art brush and a black nail polish, just draw a line between the blue part and the white part ! 
Then just add on a top coat and that manucure is done !

References :

Wednesday, December 10, 2014

Simple Love


Difficulty : 

Hey girls ! I just wanted to inform you that I've just uploaded my first VLOG ! So if you want to check it out, go ahead. And I'm going tu publish youtube tutos very soon, just the time to get a tripod ! so enjoy !
Today's weekly manucure is from far the easiest since I've uploaded my very first tuto. So anygirl can really do this. 
For this manucure you will need : two nail polishes and a dotting tool.
To get started, apply your base coat on each of your nails. Once your base coat is dry, you can apply your first coat of nail polish on each nail. Once dry, apply your second coats.

So there's the funiest and easiest part : grab your dotting tool and just make 3 dots on each of your nails with the other nail polish.
Then, all you have left to do is apply your top coat !

References :

Saturday, December 6, 2014

Pink Aztec


Difficulty : 

Hey girls ! This weekly manucure is quite the same as last week's, but a tiny more complete. It's less difficult, but you still need to remain patient though. Let's get started ! 
For this manucure you will need : a pink nail polish, a purple nail polish, a taupe nail polish, a white liner and a dotting tool. 

First, start by applying your base coat. Then paint each of your nails in pink. Once your coat is dry, paint a second one. When your second coat is dry, take your purple nail polish and draw a thick line in the middle of your nail. 
Then follow each of the steps below :
  • For your thumb and your ring finger : With your white liner, paint two thin lines surrounding your purple thick line. Then, draw thin lines in the purple spot shaping like triangles (like on the picture above). Take your little dotting tool and with your taupe nail polish, draw tiny dots on the pink space. Once your dotting tool cleaned, draw little dots on the white lines surrounding the purple line. 
  • For your index and your little finger : This step is surely the shortest and easiest ; with your dotting tool and your taupe nail polish, draw dots in the center of your nail !
  • For your middle finger : To finish your manucure, take your little dotting tool and your taupe nail polish, and draw a dotted pattern on your entire nail. Keep the spaces between the dots as equal as possible, as well as their sizes. I have to admit this is quite hard :p 
To end this tuto ; take your top coat and paint your nails with it once they all are dry.

References :

Thursday, November 27, 2014

Yellow Ts


Difficulty : 

Hey guys ! After a little extra "How To N°1 : A Perfect Nail Cession" ; Here's the new weekly manucure ! 
For this manucure, you will need : a yellow nail polish, a black nail polish, a white nail polish, a blue nail polish, an orange nail polish, 3 different sized dotting tools and a white liner. 
First and foremost, start by applying your base coat.
Then, take your main nail polish (yellow for me) and paint your first coat. Once your first coat is dry, apply your second coat.
Then, take your black nail polish and draw a thick line in the middle of your nail with your nail polish's brush. Then, take a white liner and surround your black line with medium thin lines. Then, draw lines in the black spot ; they're meant to turn out as triangles. Once you've done that, trust me, the harder part is done, all you have left to do is making dots ! So take a little sized dotting tool, and take the last two nail polishes left. Just draw dots on the white line and switch colors each time (like on the picture above). Then, take a bigger dotting tool and draw two white dots inside the triangles, only on one side. On the other one, draw a few tiny white dots. Then, take a medium sized dotting tool and draw black dots inside the white dots. And then we're done ! 

To end this manucure, apply your top coat when your nails are dry !

References : 


Tuesday, November 25, 2014

How To N°1 : Nail Polish Cession

How to make a perfect nail polish cession. 

This extra article is to help you guys how to make a perfect nail polish cession. I'll be giving you a few tips so you can keep getting better ! 

Tip n°1 : Don't ever ever forget to put on a base : If you want your nails to be kept clean (white) underneath your nail polish, it is important to put a base on. Never neglect this aspect of nail polishing. 

Tip n°2 : When laying down your base, make sure you make apply a thin coat. 

Tip n°3 : Paint your first coat thin : If your first coat is too thick, there will be two consequences to that. The first being, you will take a whole day waiting for it to dry, but MOSTLY : The final result won't be clean, your nail polish will have little splodges of air in it. 

Tip n°4 : ALWAYS wait for each coat to dry before painting another one over : If you do want nice clean nails, wait for each coat to dry (From the first, to the last one). Otherwise, the result in tip n°3 will be the same for this tip. 

Tip n°5 : Paint your second coat thicker than the first : Once your first coat is entirely dry, you can paint on your second coat. To make sure the color you want is really the one on your nail, you have to apply a thicker coat. (Thicker, but not really THICK. Just less thin.)

Tip n°6 : Top coat ! : Once you've done your manucure, wait until it is ENTIRELY dry. Otherwise, the nail polish will go away while you'll be applying your top coat. If you guys want a clear schedule : Wait one whole hour before applying your top coat. 

Tip n°7 : Just for the knowledge, a manucure takes around 6 hours to dry. For instance, if you take a fork and try rubbing your nail polish off with it, it will barely do anything. But, if you do anything else during the 6 hours, it's no problem if you just watch out. 

So guys that's all for today's extra article, next etra article will be a surprise ! I hope you liked reading and see you guys soon for the weekly manucure ! 

Friday, November 21, 2014

Crazy Red


Difficulty : 

Hey girls ! This weekly manucure is all about striping and dotting. Really fun, not so hard ; if you've been doing last week's manucure, this one is just as easy ! 
You will need : two different nail polishes, different sized dotting tools and a striping tape.
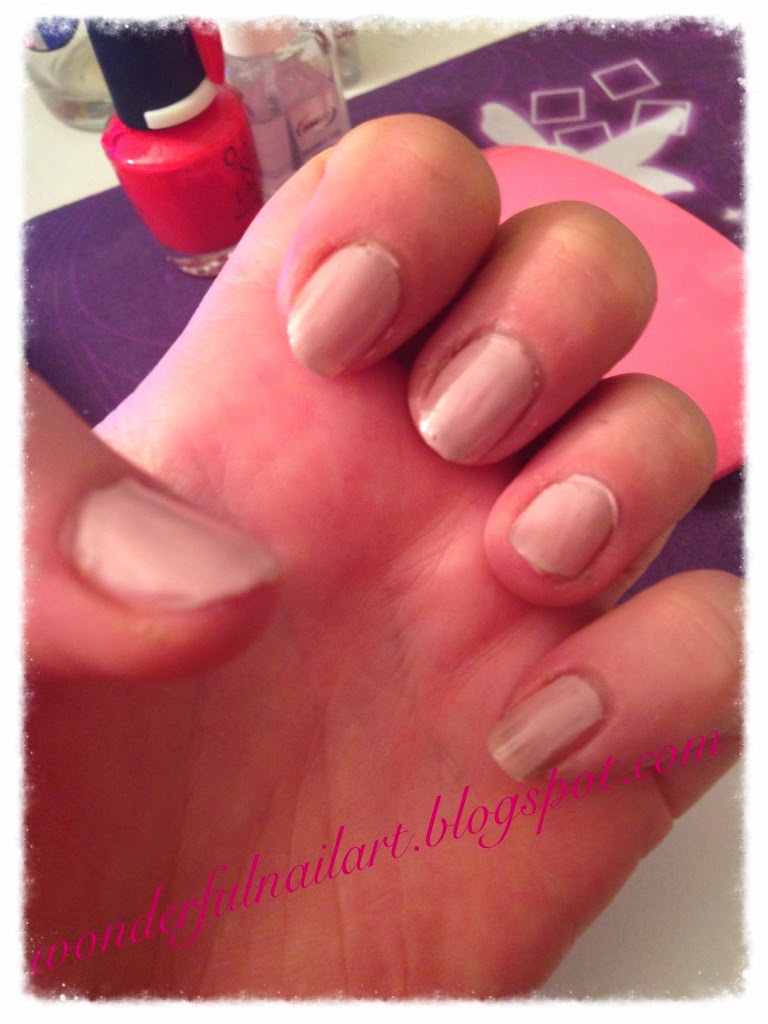
Start by applying your base. Once it is dry, you can apply on your thumb, your middle finger and your little finger two coats of your first nail polish. For your index and your ring finger, you can apply two coats of your other nail polish.
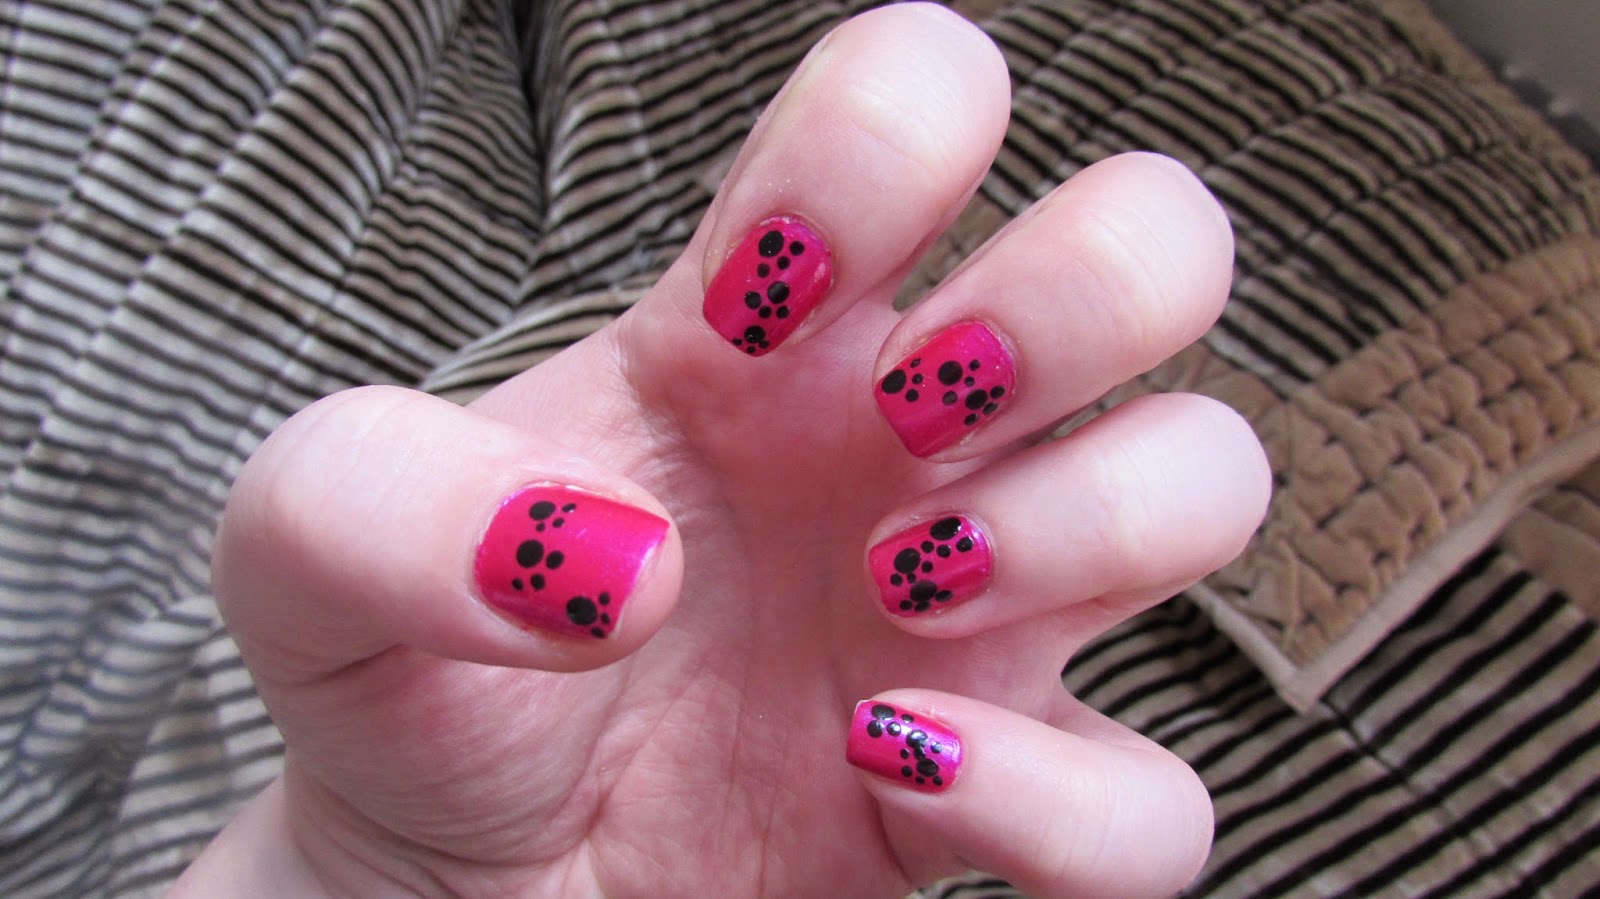
For your thumb : Take your dotting tool and your second color, and draw dots going from the top left corner to the bottom right corner. Make a few big dots, surrounded by a few little dots.
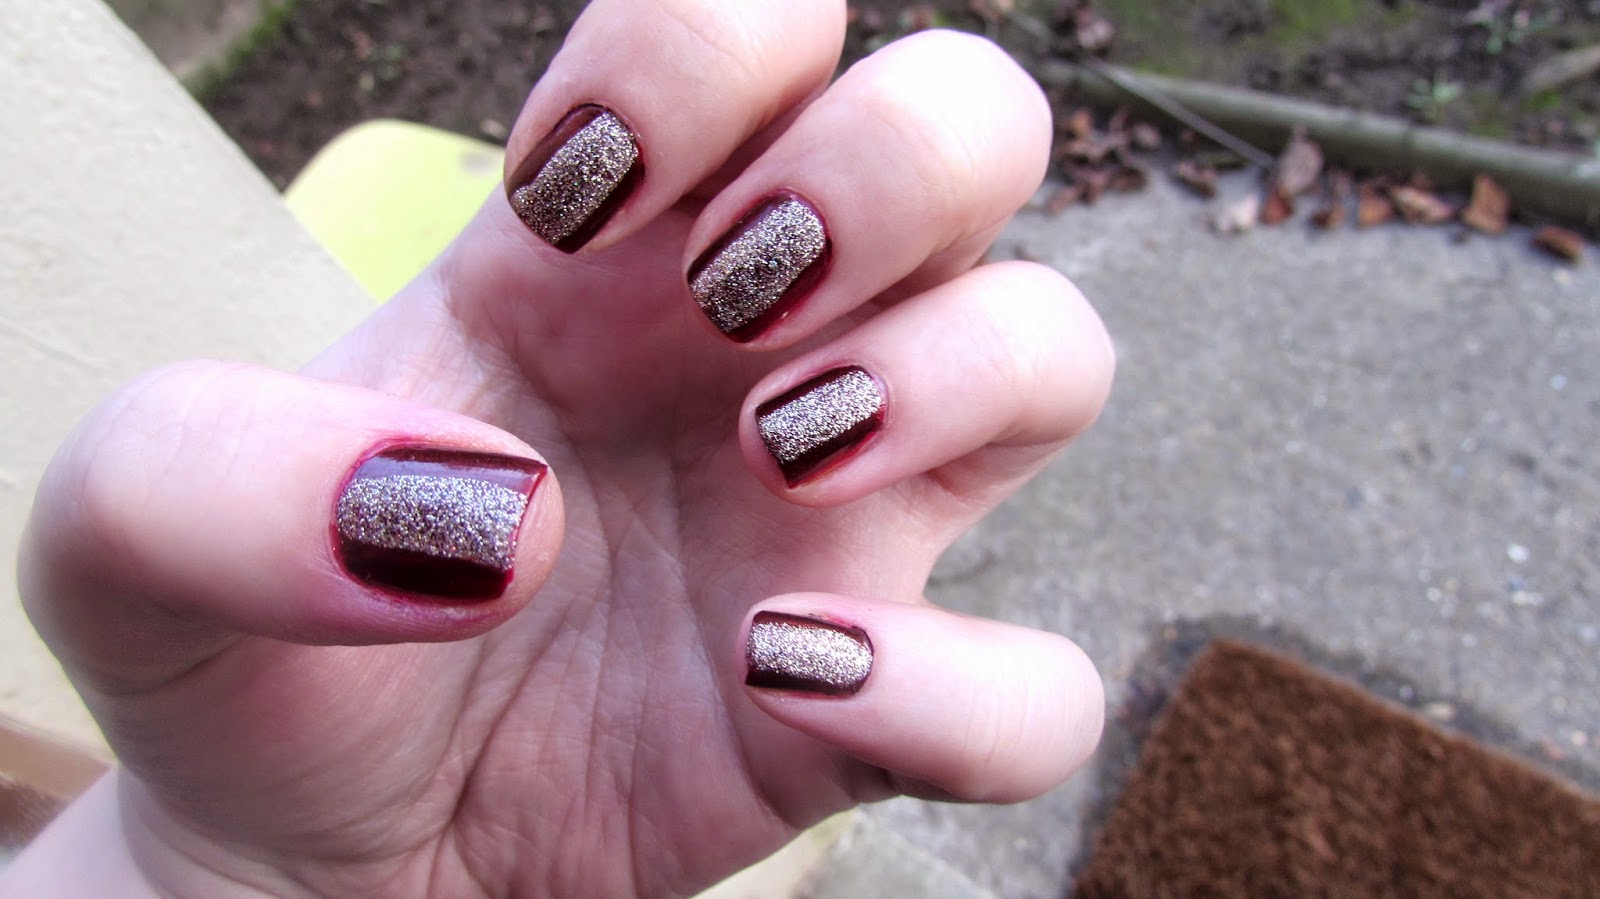
For your index : Take your striping tape and draw 3 lines pointing in the same direction (see picture above). Then, apply one or two coats of your first nail polish and take off the striping tape immediately.
For your middle finger : With your second nail polish and a big dotting tool, draw 3 big dots on the edge of your nail. Then, draw 3 middle sized dots above those 3 big dots. And draw smaller dots on top of the previous ones, and then tiny little dots on top of the small dots. Once you're done, take the first nail polish and draw smaller dots in each row like on the picture above.
For your ring finger : Take 4 stripes of your striping tape stick two vertical lines close one to each other, and do the same horizontally. Then, paint one or two coats of your first color, and take off the tape as soon as possible and very quickly.
For your little finger : All you have left to do is take a big dotting tool with your second nail polish and draw a huge dot in the middle of your finger. Then, take the same dotting tool but with the first nail polish, and draw a huge dot on the half of your first dot ; it shapes like a moon ! 

Then, like always, apply your favourite top coat ! 

References : 


Saturday, November 15, 2014

Bubbly Pink


Difficulty : 

Hey girls ! This week's manucure is mainly done with a dotting tool, so it is easy, and very fun to do ! You will need three different nail polishes, a dotting tool with different sizes and striping tape
First, start by applying your base coat. Once it is dry, apply a first coat of your nail polish on each of your nails except your ring finger, and once it is dry, apply a second coat. For your ring finger, take a mettalic color and apply two coats. 

Then, with your dotting tool and your second color (a darker color ?), draw loads of dots on the bottom of each of your nails (except your ring finger) and then make fewer and smaller dots as you go up towards the top of your nail (like on the picture above).
Then, take your first nail polish and draw smaller dots into SOME of the previous dots you've been doing before. 
RING FINGER -TADA- : Take your striping tape and stick a line onto your nail. Then, take your first nail polish and paint one coat. Then, take IMMEDIATELY the striping tape off ! -Wow, what a clean line :) ) I've added a little bow for nails with nail art glue, but even without it, this manucure is just as pretty ! 
When you're done, finish by applying your favourite top coat. 

References : 


Saturday, November 8, 2014

In The Moonlight


Difficulty : 

Hey guys ! This week's manucure is a design i've uploaded in my very first article, but without a tuto. So this weekly challenge is to reproduce this one ! 4
For this manucure, you will need : two nail polishes, a dotting tool with a large size and a little size.
First and foremost, start by applying your base coat. Once you've done this, apply your first coat of polish with the lightest color. Once your first coat dry, apply a second coat. Then, take your other nail polish and cover two thirds of your nail with it. (I chose to change side on my first two nails, to make it look a little harder than it really is) 


Once this is done, take your big dotting tool and  make a big dot with your first color on the darker side ; your dot must be really close to the edge of the dark side. Make 3 or 4 dots drawing a vertical line. Then, take your little dotting tool, and draw 6 or 7 little dots on the edge of your nail, on the dark side (like on the picture above). 
You can now take your bigger dotting tool once again, but this time with the second color, and draw a big dot on half of each of your big dots ; these dots need to get on the lighter side of your nail : Your first dots will look like moons and half of your last dots will trespass on the other half of your nail. To get done with this manucure, take your little dotting tool and use it with your first color. All you have to do is draw little dots into the big dots we've made. All you have left to do is apply a top coat ! 
Tadaaa ! You now have dashing nails ! 

References :

Friday, October 31, 2014

Special : Halloween nail art !


Difficulty : 

This weekly nail art design is out earlier because you girls need to prepare for halloween ! So I've decided to make a halloween design really fun to do and as easy as ABC. 
For this design, you will be needing : two nail polishes, a black one and a white one, a dotting tool and a medium thin nail art brush (check out the references below tuto)
Start by applying your base. Once it is dry, apply a first coat of white nail polish, and then apply a second one.

Once both of your coats are really dry, follow the instructions below :
  • For your thumb, your middle and little finger : start by taking your dotting tool, and draw two splodges like on the picture above, for the eyes. For the nose, just draw to little dots. Then, take a nail art brush and draw lines on the bottom of your nail for the "mouth", and with your nail polish, fill in black both sides on the edge of your nail. You can now see a skull through all of these lines and dots ! 
  • For your index and your ring finger : Crazy easy frankenstein : start by drawing two big dots for the eyes, and then just draw a line for the mouth. Just add lines on the mouth to make it look like a monster ! 
Once you're done, don't forget to add on your top coat to make it nice and shiny ! 

References :


Friday, October 24, 2014

Puzzled Love


Difficulty : 

This weekly nail art design is a puzzle ! 
It's really fun and easy to do so grab two nail polishes and a dotting tool ! 
First, start by applying your base coat. Then, once this coat is dry, grab both of your black and white (or beige) polishes, and paint half of your nail white, and the other half black. 

Then, keep both of your nail polishes, and paint the bottom quarter of each nail in the opposite colour. For instance, on the white half, paint the bottom in black, like on the picture above. 
Once you've done that with each of your nails, take a dotting tool. With each part of your nail, make a big dot on the other part of each colour. (For instance, with a black part, make a black dot spreading towards the white part ; see picture above)

When you have done a dot for each part of each nail, apply a matte top coat on top of your nails !

References : 


Friday, October 17, 2014

Make It Short Til Spring

Français 

Difficulty : 

Hey guys !
This weekly manucure is so called so, because I know we all want this heavy weather over so we could enjoy the sun again and AGAIN !
However, you will be needing five different nail polishes, a dotting tool and a nail art brush. (Check the references down below the tuto)
First and foremost, start by applying your base. Once it is dry, apply one coat of your green nail polish. Wait until it dries (if only autumn and winter go past as quickly as you're waiting for your coat to dry...) And then apply a second coat.


Once you've done that, take your nail art brush (a thin one !!) and draw colourful leaves and a few flowers with your pink nail polish on all of your nails, with no specific pattern. Then, take your purple nail polish and draw very thin lines in the leaves and the flowers you've drawn to give them perspective, and make them more "realistic". Once you're done with that, grab your dotting tool and a yellow nail polish, and just make dots here and there next to your flowers and your leaves ; I also did a dot in the middle of each flower if you look carefully. Then, just to finish your  nail art, take your last nail polish and make just a few dots. Then we're done, you can just finish by applying your top coat !

References :

Back to Home Page


Saturday, October 11, 2014

Fall Nail Art


Difficulty : 
Hey guys !
This weekly nail art is fall inspired ! So much darker as I usually do, but really loads of fun to do ! 
For this nail art, we will be using 6 different nail polishes and a thin nail art brush.
Start by applying your base coat. Once this is done, paint each of your nails with a black nail polish. 
Once your coat is dry, follow the instructions below :
  • For your thumb : Take a pink nail polish, and using a nail art brush, just do thick lines reaching towards the ends of your nail. Once your lines are dry, take a light brown nail polish and draw thiner lines into the pink lines we drew earlier.
  • For your index, your middle finger and your ring finger : With your silver nail polish, draw a a medium sized line in the middle of your nail. Then, grab your nail art brush, and draw really thin lines (those lines being irregular with different sizes) reaching towards the black sides of each nails. The effect expected is similar to a gradient (like on the picture above). It's really fun to do and really easy !
  • For your little finger : You just have to apply a matte top coat on top of it. When your top coat is dry, take your black nail polish and draw a thick line at the bottom of your nail, just like a french manucure. 

Once you're done with each of these steps, you can apply your shiny top coat on each of your nails except the little one (which already has been matified). 
TADA !

References :

Saturday, October 4, 2014

Pink Power Gradient

Difficulty : 

Hey Guys !
This weekly manucure is a pink gradient ! 
For this manucure you will need : a make up sponge, two nail polishes (check the references down below) and a top coat.

First and foremost, start by applying your base coat.
When you're done, take your make up sponge and your two nail polishes and apply a thick layer of each nail polish on your sponge. (Just like the picture below)


Then, press your sponge onto each of your nails as many times as you need until you get a satisfying gradient.
---My piece of advice on gradients : To protect your fingers while pressing your sponge onto your nail : put a few pieces of scotch around your nail ; the polish won't get onto your finger
If you have pale colors, I suggest you put on a white base first, then the colors will be brighter
Don't hesitate to start over again until you get the perfect gradient---


Once you've got the perfect gradient, apply immediatly your top coat ; Your colors will fade in each other better. 


References :


Sunday, September 28, 2014

Essie's Dots


Difficulty : 

This weekly nail art design is called Essie's Dots because I very mostly used Essie nail polishes. 
For this manucure, you will need : three different nail polishes and a medium sized dotting tool ! (Find the brands down below)
Start with your base ; once your nails are all dry, take your first nail polish and paint your thumb, your index and your little finger. Grab your second nail polish and apply it on your middle finger and your ring finger. 
Once your first layers are dry, apply a second layer on each of your nails. 
Once you're done, take your dotting tool and follow the instructions below :
  • Thumb : Take your second nail polish and start by drawing dots on the right edge of your nail leaving space between each of them. Then, take your third nail polish and fill in the blanks we left !
  • Index : Do the exact same thing but instead of drawing dots on the right edge, draw the dots on the left edge of your nail. 
  • Middle finger : This time, take your first nail polish and start by drawing dots on top of your nail leaving blanks bewteen them like we did the last time. (I did a few more rows, you can do as much as you want). And let's fill in the blanks with the third nail polish (using our dotting tool of course) !
  • Ring finger : The pattern here is basicaly the same as the middle thinger except that we draw the dots on the bottom edge of our nail. (Look at the picture)
  • Little finger : This pattern is similar to the second one, but instead of drawing a straight column, draw the dots from top left to bottom right
Once you're done with all your nails, wait for them to dry and then apply your top coat ! 

References :


Friday, September 19, 2014

Manucure Lune

Français

Difficulty : 

Hey guys, as promised the tuto from the VERY FIRST nail art manucure ever done : The "Manucure Lune" !
For this manucure you'll be needing : one OR two nail polish including a nude and and red or coral ; your top coat and your base.

First start by applying your base. Then, what is particular is the nail art is that I've decided to add my own touch to it. So I've put a nude nail polish as a color base. You can either do it, or let it be natural.

Once this is done, you have to make a choice ; You can either take an eyelet to help you with this design OR you can also just do the curve with your nail polishs' brush.
So take your second nail polish color (it may as well be your first), and fill in the rest of your nail leaving the base of your nail clear. 
Then, when your layer is dry, paint a second layer to make sure it is smooth. 


And once we're done with that, apply your top coat to make it nice and shiny. 
This week's nail art design was indeed special and I'm looking forward to receiving all of your recreations of this design so I can maybe post them on the blog if you're okay with that.

References :